
Once Human gives you a lot of freedom from the start. That is mostly a good thing, but it also means the game rarely tells you what to prioritize. Most new players either follow the main quest too rigidly and miss systems that would save them hours, or they ignore the quest entirely and get lost in the open world without the gear to survive it.
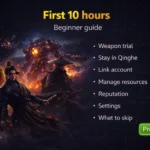
This guide covers the early decisions that actually matter. Follow these and your first few hours will feel like progress instead of confusion.
DOWNLOAD NOW
Pick your server type before anything else
When you first launch Once Human, you choose a Scenario and a server. Manibus is the right Scenario for new players. It is the main story scenario and the best-supported one in terms of content and active playerbase.
The server type matters more than most guides mention. PvE servers mean other players share your world but cannot attack you or raid your base. PvP servers add direct player conflict and resource competition. If you are just starting out, pick PvE. There is no penalty for switching later, and learning the game without the added pressure of player raids is genuinely easier.
Your character weight affects more than appearance
The weight you choose during character creation has real gameplay consequences. Most new players skip past this thinking it is purely cosmetic.
Underweight characters (under 65kg) have faster stamina recovery and quicker attack speed, which helps in combat, but they carry less and deal lower base damage. Overweight characters (over 85kg) carry more and hit harder in melee, but roll slower and are harder to maneuver in fights. Moderate weight (65 to 85kg) sits in the middle on all stats and is the right call for a first playthrough. You can adjust your weight later by eating specific foods, so this is not a permanent commitment.
Follow the main quest until you have a motorcycle
The main quest in Once Human is basicly a guided tutorial that gives you real rewards. It walks you through combat, resource gathering, base building, and crafting in a sequence that unlocks each system in a sensible order.
The most important milestone is the motorcycle blueprint. The main quest gives it to you relatively early, and crafting it changes your relationship with the map entirely. The open world is large. On foot, reaching resource-rich areas takes time. On a motorcycle, the same distance becomes manageable in a minute or two. Get this as early as possible and do not skip the main quest sections that lead to it.
Memetics: Infrastructure first, middle row
Once you open the Memetics screen, most new players look at four skill trees and freeze. Here is the simple version.
Go to Infrastructure. Look at the middle row. Unlock Bronze Casting first. This single unlock lets you craft tier 2 and tier 3 weapons, which is the differance between struggling against mid-game enemies and handling them efficiently. Everything else in the early game follows naturally once your weapon tier catches up with the areas you are exploring.
You do not need to plan your full Memetics build before you start. Early respecs are essentially free. Spend points, see what you unlock, adjust as you learn what you actually need.
Get your first Collection Deviants early
Deviants are creatures you collect and assign to your base. Combat Deviants fight alongside you. Collection Deviants automatically gather resources from your territory while you play or even while you are offline.
The game will give you your first Deviant, Butterfly’s Emissary, through the main quest. It is a Combat type. After that, prioritize finding Logging Beaver and Digby Boy. Both spawn in the starting regions and are especialy useful early: Logging Beaver gathers wood automatically, Digby Boy gathers ore. With these two running at your base, you return from every exploration session to a resource stockpile instead of an empty storage.
Most new players miss this for several hours and wonder why resource gathering feels slow.
Activate Teleportation Towers and watch your Energy Links
Teleportation Towers let you fast travel across the map. You need to physically visit and activate each one before it becomes available. Make activating them a habit whenever you encounter one while exploring.
Teleportation costs Energy Links, which is also a crafting material for mid and late game gear. The temptation to teleport everywhere early will drain a resource you will want later. Walk or ride your motorcycle for shorter distances. Save teleportation for situations where time genuinely matters.
Keep an eye on your Sanity
Sanity decreases when you enter pollution zones, fight certain enemies, or eat contaminated food. When it drops, your maximum HP shrinks with it. Low Sanity in a difficult area means you are weaker exactly when you need to be strong.
Sleeping at your base resets Sanity fully. Cooking and eating clean food maintains it during longer sessions. Keep a few Sanity restoration items in your inventory before entering any zone with visible pollution. The game doesn’t explain this connection very well early on, but once you understand it you will never go into a pollution zone unprepared.
Set up a camp when exploring far from base
Your base is where your full crafting setup lives. But the world is large and you will often be far from it. The portable camp lets you cook food, boil water, and craft basic weapons and armor wherever you are. Set one up whenever you plan to explore for more than a few minutes away from home territory.
The early game rewards players who prepare before leaving base. A camp, a Sanity item or two, clean food, and a repaired weapon are all you need to turn an uncertain expedition into a productive one.
Once Human opens up quickly once these foundations are in place. The systems that seem complex in the first hour become second nature by the third.
DOWNLOAD NOW


Join the Discussion